


Artificial 3D hanging raft with lush green foliage and trailing plants - 100x50cm
Available in stock
Couldn't load pickup availability
A fantastic hanging raft of lush undulating carpet of 3d green plants tropical palms, ferns, white tipped grasses, long trailing ferns, trailing bamboo, trailing eucalyptus and trailing jasmine.
These panels are realistic, durable, handmade 3D plant wall panel constructed with artificial plants fixed to a rigid, powder coated metal grid.
These panels are supplied with an adjustable backing chain which can be used to suspend the panel from a ceiling. The chain is also removable so they can be screwed directly into the ceiling if required. They can also be hung vertically on a wall .
Weather and UV resistant, suitable for indoors and outdoors.
100 cm x 50 cm panel.
Once installed these panels are virtually maintenance free, they only require an occasional clean and dust.


Your payment information is processed securely. We do not store credit card details nor have access to your credit card information.
FAQ
FAQ
- Are the artificial plant wall panels UV stable ?
Yes, the artificial foliage has been subjected to light ageing-UV tests with no visual changes. We offer a 3 year UV warranty. - Is this artificial plant wall panel flame retardant ?
This artificial plant panel is NOT inherently flame retardant. If your risk assessment requires that the green wall panels must be flame retardant we recommend hand spraying them with a flame retardant treatment spray such as Envirograf 321 Flame Retardant Spray (EV321S Special: Plastic artificial plants / flowers and decorations).
If you need more information please get in touch with us
Delivery & shipping
Delivery & shipping
We have two delivery options to choose from which vary in price and speed to suit your needs.
Standard 2-4 business day
Your parcel(s) will be delivered using the Parcelforce Express48 service and costs £9 inc VAT per parcel.
Express 1-2 business day
Your parcel(s) will be delivered using the Parcelforce Express24 service and costs £15.00 inc VAT per parcel.
For larger 1m x1m metal grid frames and other over sized items the delivery cost will be calculated at checkout.
Installation instructions
Our ultra realistic 3D plant panels will arrive flattened in the box, you will need to pull and fluff out the foliage to make the wall as realistic as possible. For each individual bush pull some of the foliage out from the rear frame and tease the leaves into shape. Be sure to tease the foliage over to hide any gaps. The video demonstrates how to do this.
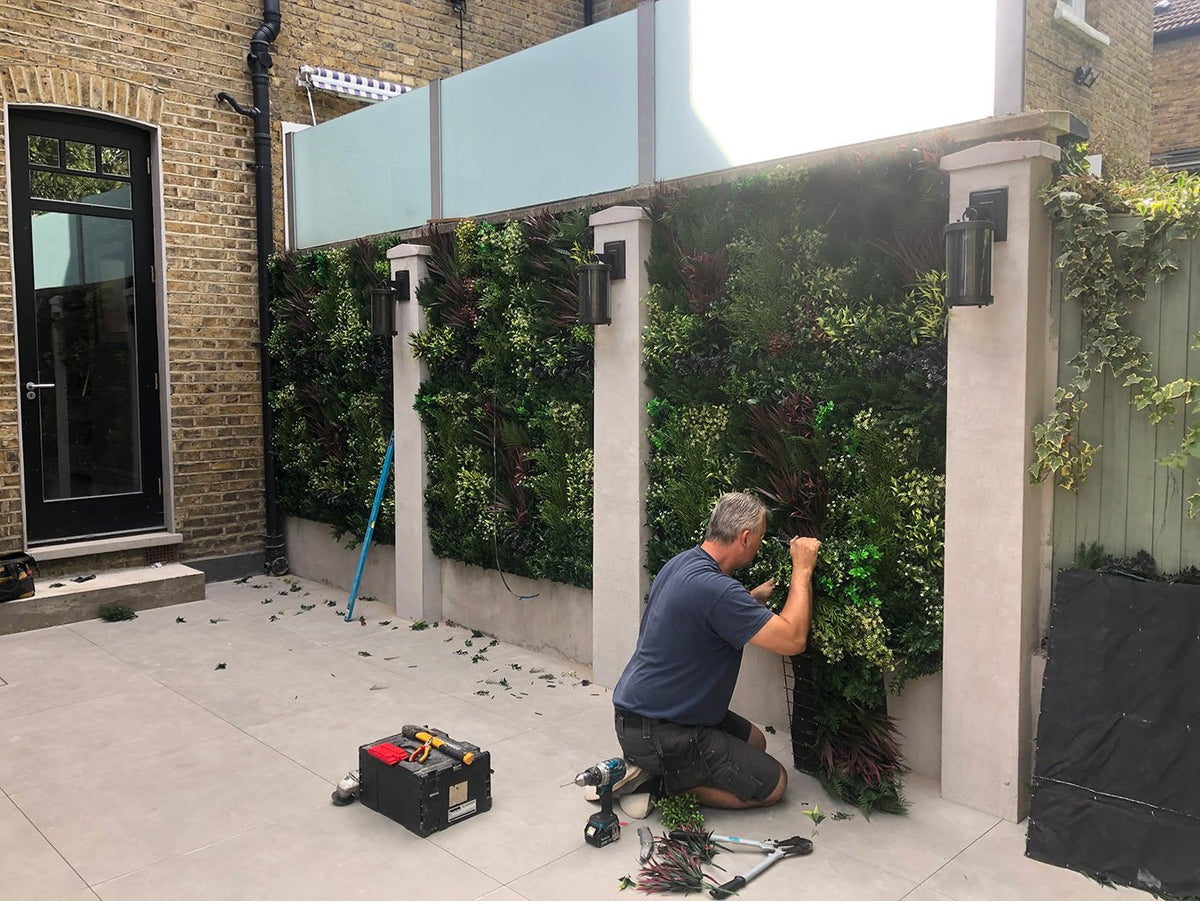

We recommend that you screw the panels directly into the wall using the appropriate screws, washers and plugs depending on the wall type. There are plenty of holes and slots in the plastic back panel which can be used for the screws.
- Plasterboard – Our preference is to screw directly into the wall using a 20mm plasterboard screw and washer with a good thread. There are pre-made holes on the back of the panels for you to use.
- Timber – Simple timber screws only. Try using a screw with a large head or washers.
- Stone wall & concrete – Pre drill a hole, add a plastic plug and screw with a washer. If you are unable to drill the wall, try cladding the wall with plywood and use timber screws.
- Wire fence – Use black cable ties to hold in place.
- Fence – Screw directly using metal screws and washers. If you don’t want exposed screws on the other side, you can pre-drill a few holes in the fence and use black cable ties to hold it all in place. If this also isn’t an option, we recommend making a timber frame to mount your panels on.
Tools required
You will need a drill, a spirit level and a ladder if working at height as well as plenty of screws and washers. I would recommend 6 screws and washers per 0.5 m2 panel , 2 along the top and 2 along the middle and bottom of the panel.
To cut the metal grid we recomend using small bolt cutters or a hacksaw. Just in case of any sharp edges, we recommend taping over the cut ends.

Fixing instructions
- Make sure the plants on the panels are facing upward when you hold them up to the wall. Make sure each panel is orientated the same way before fixing.
- When you begin, be sure to start from the top left or right corner and work your way across.
- Use a spirit level to mark a line for fixing points across the top of your wall.
- Fix your first panel in place using the guideline. I find it easier to mark to the position of the screws on a wall and then drill and fix the screws into the wall. Once I have done this I then hang the panels on the screws (with washers), making sure the panel is level before tighening the screws (with washers). You will have have to cut the hessian backing before hanging on the screws.
- Put your next panel in place and screw the top using your guideline to keep level.
- Repeat this process until the top row is complete.
- Once the first row is in place and fixed to the wall on the top and bottom, move on to the second row.
- Repeat until finished.
These panels will arrive flattened in the box, you will need to pull and fluff out the foliage to make the wall as realistic as possible. For each individual bush pull some of the foliage out from the rear frame and tease the leaves into shape. Be sure to tease the foliage over to hide any gaps.

Out of the box
When you unwrap the panel, the foliage will be flat. You will need to pull and fluff out the foliage to make the wall as realistic as possible.

Fluff out the foliage
For each individual bush pull some of the foliage out from the rear frame and tease the leaves into shape. Be sure the fluff out the foliage to hide any gaps.

Rear of the panel
The rear of the panel is covered with black hessian material, so no need to paint the wall you are hanging the panels on.

If you need any more help or more information about installing the green wall panels please call us on 01260 541893 or send an email to support@greenplants.co.uk