


Artificial green wall with mixed green pink white yellow foliage 1m2 - GWRBB
Out of stock
Couldn't load pickup availability
This 1m2 panel is part of a 3 panel GWCOMBORB collection, each panel is made of the same types of foliage and colours but the layout is different on each panel.
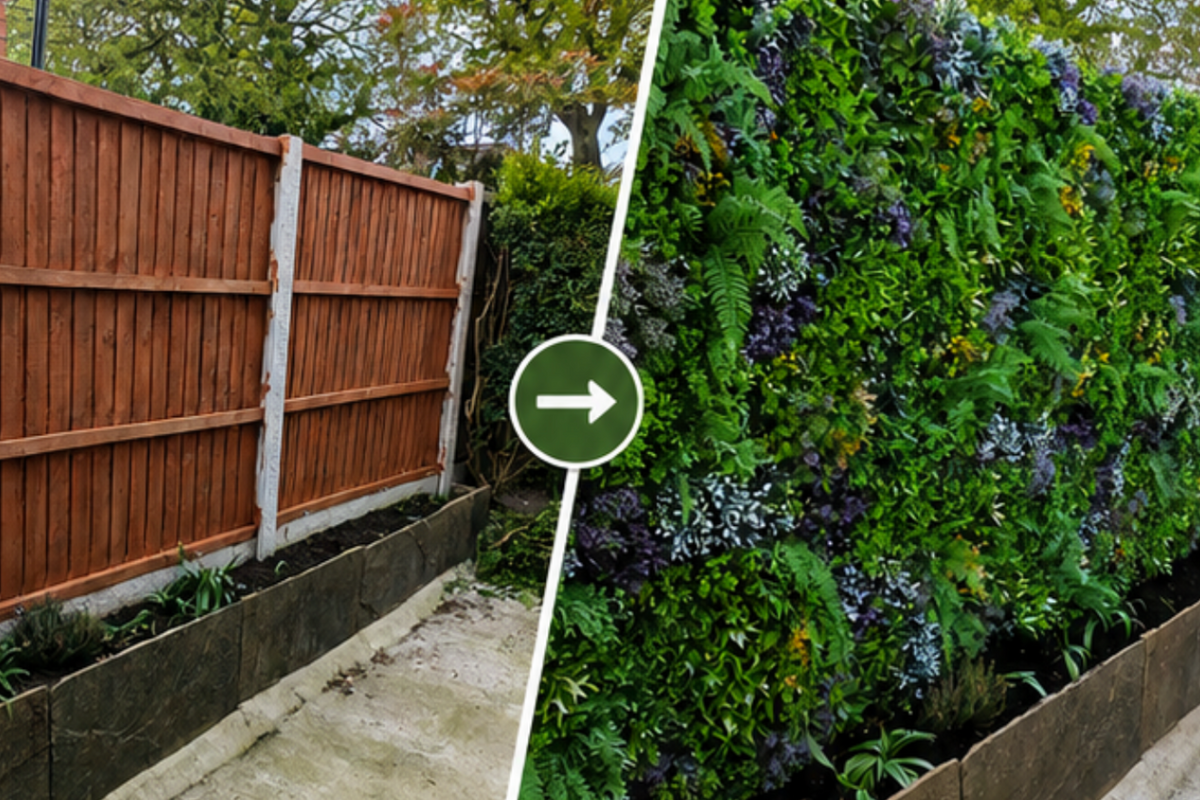
The artificial green wall GWRBB is a 1 m² mixed-foliage panel designed to create a decorative green wall indoors or outdoors. Its foliage combines variegated dark and light green shades with red grasses, jades, dracaena fronds, ferns, silver thickets, and tiny white and yellow bayberry flowers. The existing product description identifies a realistic appearance and a 3D effect.
Materials and dimensions
The panel foliage abd backing grid is made from polyethylene (PE). It measures 1 m × 1 m, covers 1 m², and has a depth of 5–8 cm.Each panel weighs 3kg.
Features and use cases
- Mixed foliage includes dark and light green leaves, red grasses, jades, dracaena fronds, and ferns.
- Silver thickets and tiny white and yellow bayberry flowers add further foliage and colour variation.
- The panel has a 3D effect and is described as realistic and durable.
- It is weather- and UV-resistant, with a 3-year UV warranty.
- Use the panel to cover a wall or fence indoors or outdoors.
- It is suitable for spaces where conditions are too dark or cold for a live green wall.
Included and care
Up to 5 x 1m2 panels in a box measuring 102 cm x 52 cm x 36 cm.
Screws and fixings are not included.


Your payment information is processed securely. We do not store credit card details nor have access to your credit card information.
FAQ
FAQ
- Are the artificial plant wall panels UV stable ?
Yes, the artificial foliage has been subjected to light ageing-UV tests with no visual changes. We offer a 3 year UV warranty. - Is this artificial plant wall panel flame retardant ?
This artificial plant panel is NOT inherently flame retardant. If your risk assessment requires that the green wall panels are flame retardant we recommend hand spraying the panels with a flame retardant treatment spray such as Envirograf 321 Flame Retardant Spray (EV321S Special: Plastic artificial plants / flowers and decorations).
If you need more information please get in touch with us.
Delivery & shipping
Delivery & shipping
We have two delivery options to choose from which vary in price and speed to suit your needs.
Standard 2-4 business day
Your parcel(s) will be delivered using the Parcelforce Express48 service and costs £9 inc VAT per parcel.
Express 1-2 business day
Your parcel(s) will be delivered using the Parcelforce Express24 service and costs £15.00 inc VAT per parcel.
For larger 1m x1m metal grid frames and other over sized items the delivery cost will be calculated at checkout.

Installation instructions
We recommend that you screw the panels directly into the wall using the appropriate screws, washers and plugs depending on the wall type. There are plenty of holes and slots in the plastic back panel which can be used for the screws.
- Plasterboard – Our preference is to screw directly into the wall using a 20mm plasterboard screw and washer with a good thread. There are pre-made holes on the back of the panels for you to use.
- Timber – Simple timber screws only. Try using a screw with a large head or washers.
- Stone wall & concrete – Pre drill a hole, add a plastic plug and screw with a washer. If you are unable to drill the wall, try cladding the wall with plywood and use timber screws.
- Wire fence – Use black cable ties to hold in place.
- Fence – Screw directly using metal screws and washers. If you don’t want exposed screws on the other side, you can pre-drill a few holes in the fence and use black cable ties to hold it all in place. If this also isn’t an option, we recommend making a timber frame to mount your panels on.
Tools required
You will need a drill, a spirit level and a ladder if working at height as well as plenty of screws and washers. I would recommend 9 screws and washers per 1m2 panel , 3 along the top and 3 along the middle and bottom of the panel. You will also need a pair of scissors if you have to cut any of the panels to size or shape.
This is not essential but we recommend painting your wall black or dark green for the best possible finish.

Step 1
Make sure the plants on the panels are facing upward when you hold them up to the wall. Make sure each panel is orientated the same way before fixing by checking the holes & clips are all orientated in the same way.

Step 2
When you begin, we recommend fixing the top left or right corner first and work your way across the wall. Use a spirit level to mark a guideline for fixing points across the top of your wall.
Ensure the first panel is level before fixing to the wall. Fix your first panel in place using your guideline, there are plenty of holes and slots on the back of the panel to use for your screws.

Step 3
Put your next panel in place and screw to the wall using your guideline to keep level. Clip the two panels together using the pins and holes on the sides of the panel backing grid.

Step 4
Repeat this process until the top row is complete. Use 3 screws for the top of the panel to ensure it is fixed completely flat to the wall. Once the first row is locked in place and fixed to the wall on the top and bottom, move on to the second row.

Step 5
Simply use the clips on the bottom edge of the top panels to lock the next row in place. Once clipped in place, screw the panels to the wall to secure them.

Step 6
Once finished be sure to fluff and tease out the foliage out of the wall, so it is lush and full. This is particularly relevant where the panels join, you must do this in order to hide the joins.

If you need any more help or more information about installing the green wall panels please call us on 01260 541893 or send an email to support@greenplants.co.uk